Friday, April 4, 2014

Friday, April 4: Landscape Panoramas & Introduction to Final Projects

Friday, April 4: Landscape Panoramas & Introduction to Final Projects

Class Panorama from Fall 2013

I hope you all had a wonderful and productive week! We are getting close to the end and crunch time will soon be upon us.

Today we'll learn how to make Landscape Panoramas. Next week we will critique them. You need at least 3 Panoramas printed and posted to your blog by class time next friday, April 11. 

TIP: Take the images for one pan and use all the different options available to you in the "photomerge window," as seen here.


Panoramas (the easy way): 

Set your camera to fully manual settings. (manual focus, manual exposure). 

Turn your camera horizontally. Take a series of images in an approximately 180 degree span, making sure to overlap your images by about 50%. Process them in Lightroom. (You may use lens correction to remove distortion), then export them to Photoshop.

In Photoshop, select the images and go to FILE> AUTOMATE> PHOTO MERGE. Select the files and hit OK. Once Photoshop merges the files, flatten them, make any additional adjustments and crop if needed. 

Things to think about: Does the white background work for your image, or would it be better cropped? Does black and white add to the image or would it be stronger in color? How does your image stand up to the others? How many layers did you use? Which are best, and why? 

http://www.hongkiat.com/blog/30-examples-tutorials-of-stunning-polar-panorama-photos/

Chuy Benitez


George Küttinger

Thinh Le, Courtyard

Mark Klett, Panorama from Sentinel Dome, 2003


Bonus: For 5 Bonus points, try doing the circular panorama as well and post it to your blog.


Friday, March 28, 2014

Friday 3/28/ 14 Critique // TriangleTriangle addenum

Today in class we critiqued our Levitation, Hockney, and Multiple Me assignments. We also filled out our print cards and learned how to use the print lab.

You guys did fantastic today! Keep up the good work.


I was informed in class today that the TriangleTriangle blog has been taken down. However, the tumblr is still up. 


BLOG ARTICLE POST EDIT: I would like you to go to triangletriangle.tumblr.com and critique 1 image. You will need to post the image and link back to the site. But instead of critiquing an article about a piece of artwork, we will critique just the artwork.

Please have this up on your blog by next Monday, March 31. 


Your assignment for the week is to get your blogs and assignments up to date. I want every person to be current with projects.

Next week, I will discuss the Final Project. 


Friday, March 21, 2014

Last Chance

March Make-Up Mid-Term Grade Madness


In honor of March Madness, I will be offering a Last Chance effort to get up to date with any missing assignments. 

If you complete your missing assignments, I will give you partial credit. This can be the difference between 2 letter grades for some students. 
(The difference between passing and failing!) 

To do this:

  • Post all missing assignments in 1 blog post. Title it, "Last Chance." You will then need to email me @ Kristina.Smith@tamuc.edu to notify me that it has been completed.  
  • I will then check your post and grade accordingly.
  • This must to be done by 11:59 pm on April 11 to receive credit.
    • If you were not in class today and are unsure what you are missing, or were unclear during class, please email me to double-check which assignments you are missing. 

Friday March 20, 2014

Multiple Me

Assignment #3: Multiple Me or Multiple Places

For this project you will create 2 images that composite different (multiple) photographs together.

It's very similar to the "Levitation" images we made using PS layers. 

  • TIP: When you're shooting, be sure to set your camera exposure and focus to manual. And DO NOT move your camera! 
You want your two final photographs to be connected visually and thematically. 

  • TIP: Be thoughtful about the content – what ideas are you addressing? How does the composited image facilitate these ideas? Is the work narrative-based – do you want to tell a story? Are you interested in blurring the boundaries between fantasy and reality? Etc.

We'll all do several in class, then you will do two more on your own. One of them should use you as the subject.

Assignment:
You will post your 2 photographs to your blog and bring in your 2 photographs to project in class for critique.

DUE: March 28

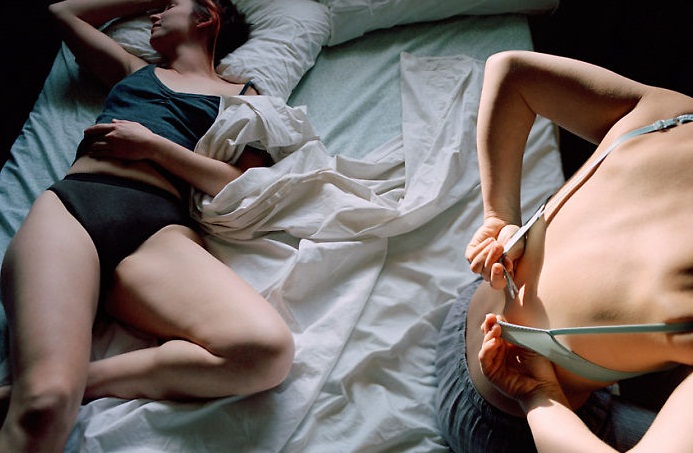
For inspiration look at artists: Kelli Connell, Anthony Goicolea, Deborah Oropollo, Peter Funch
  
The Space Between from "Double Life," Kelli Connell

Getting Up from "Double Life," Kelli Connell

From the series "You and What Army" by Anthony Goicolea

From the series "Deja Vu" by Peter Funch

Care Taker from the series "Babel Tales" by Peter Funch

From the series "Rapport" by Claudia Rogge

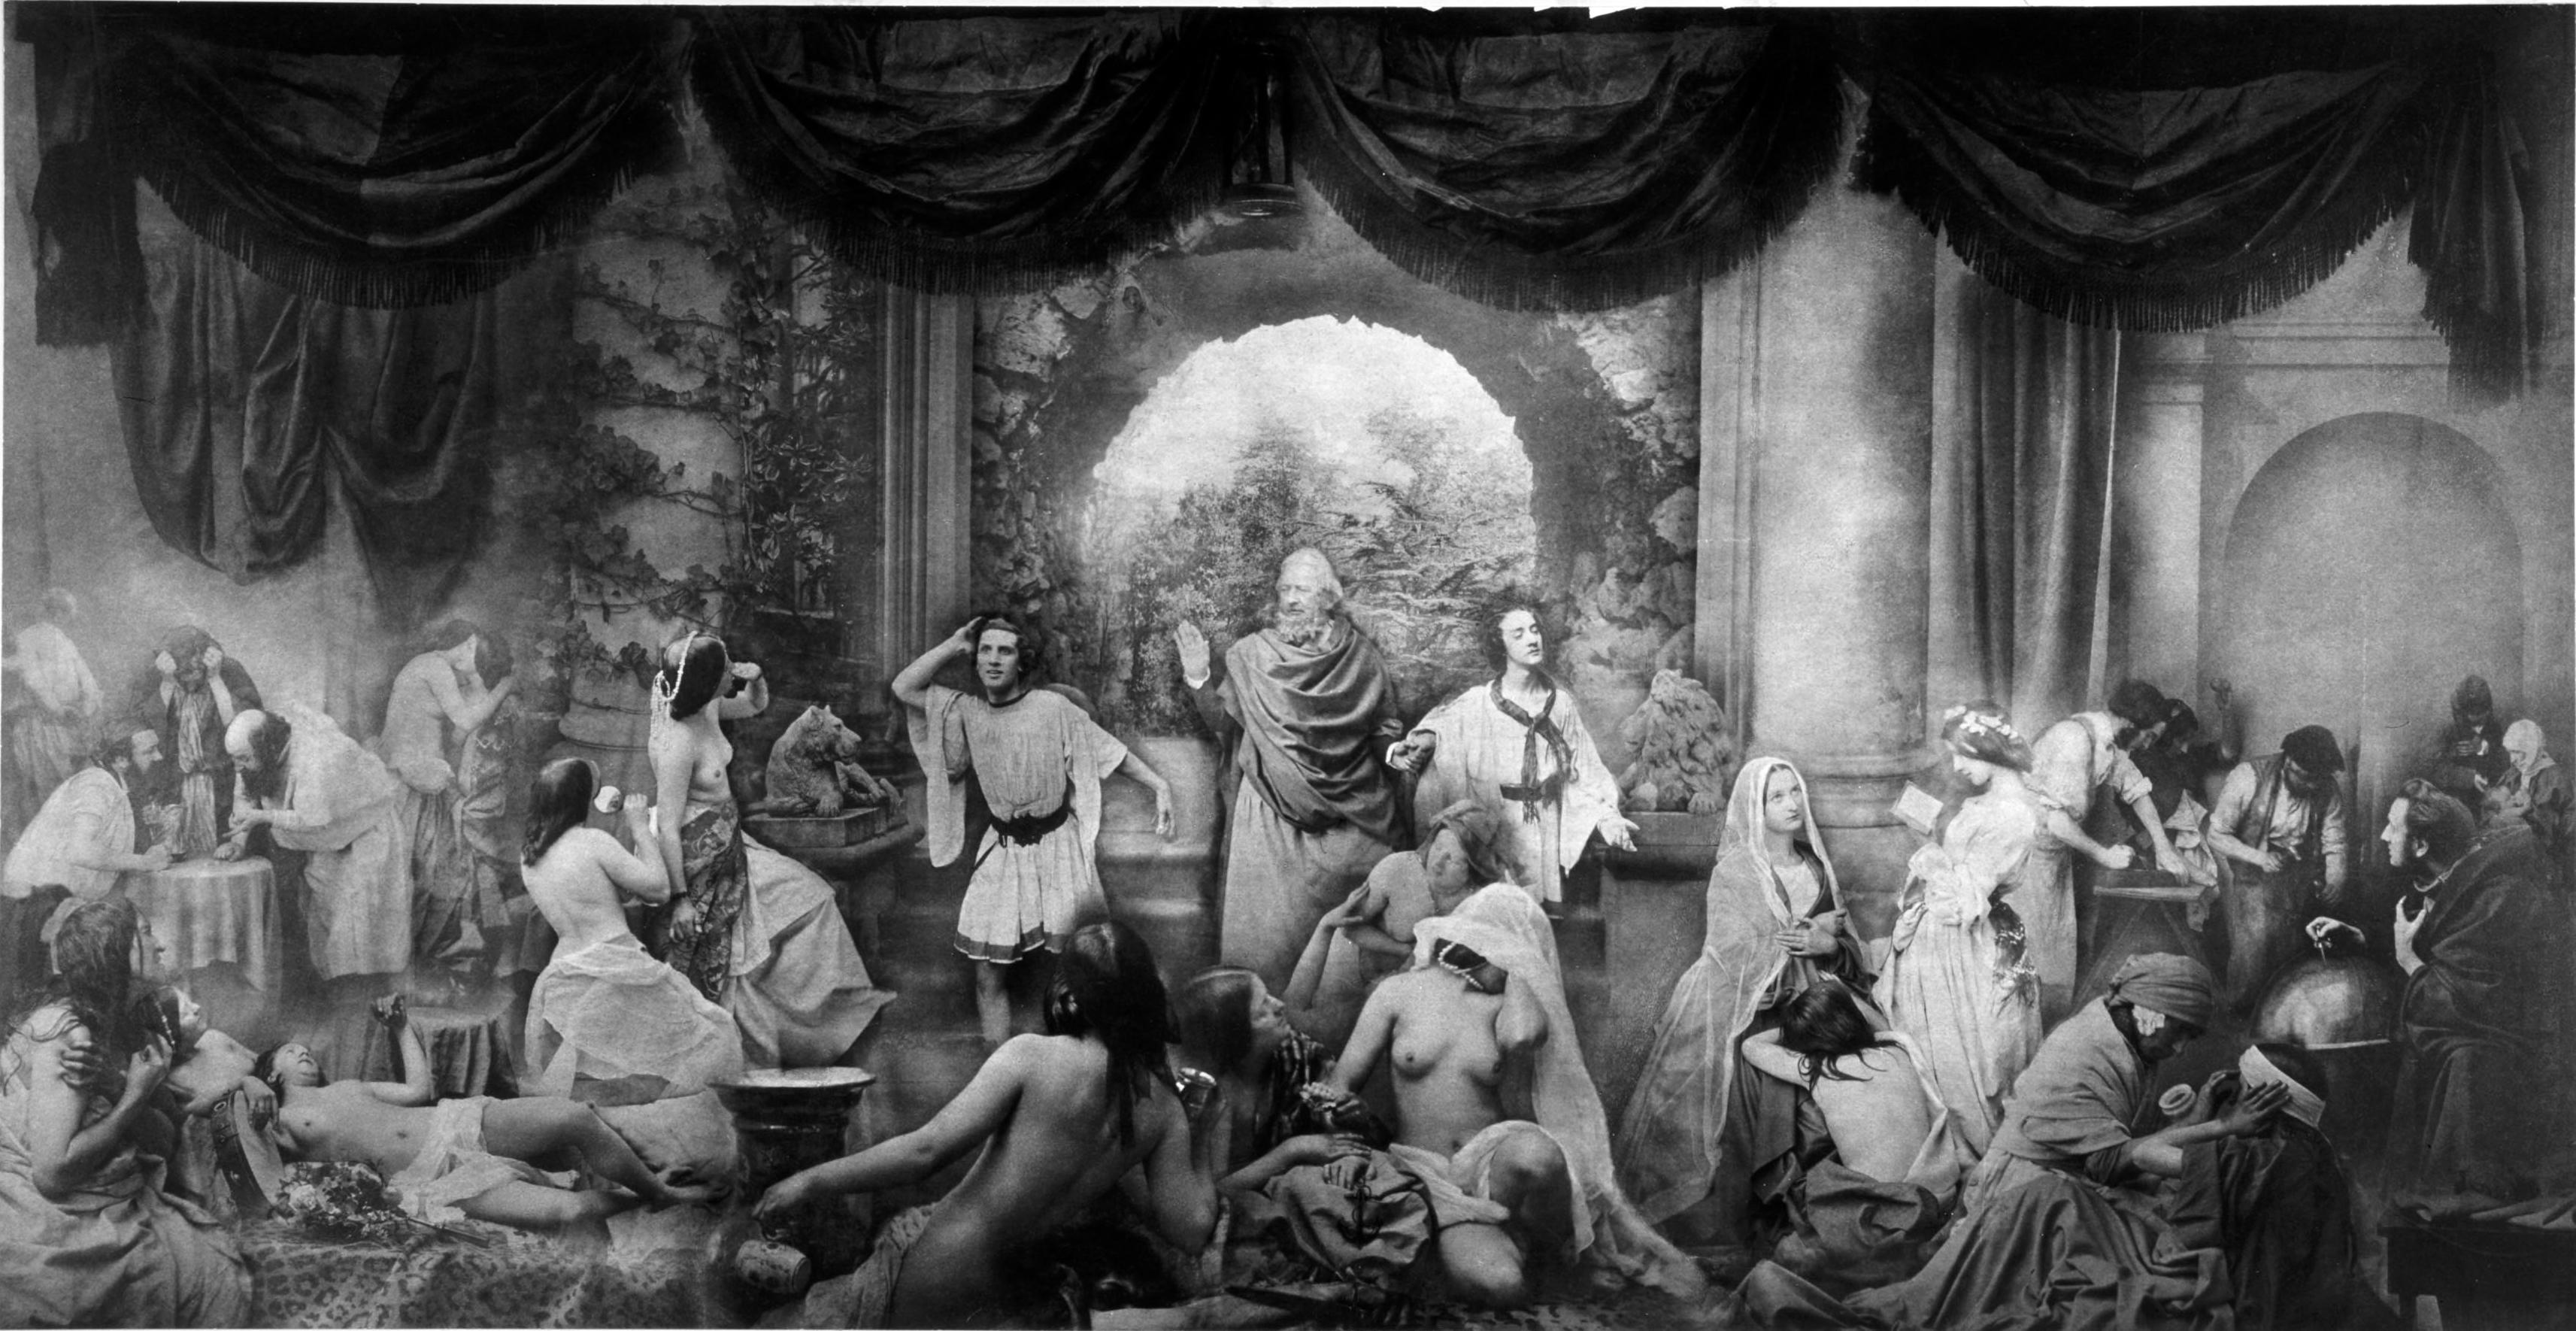
Think combination or montaged images are only a recent development from the advent of Photoshop?

Check these out: 
Oscar Gustave Rejlander's allegorical tableaux The Two Ways of Life consisted of over 32 negatives. 1857 

Henry Peach Robinson's famous morbid image Fading Away. 1858


Helpful Guides:

  • http://content.photojojo.com/inspiration/a-digital-guide-to-cloning-yourself/
  • http://paintthemoon.net/blog/2011/07/photoshop-actions-how-to-creating-a-composite-image-combining-multiple-photos-to-create-magic/
More inspiration:

How to do this step by step:
  1. Shoot 2 images. 1 with yourself in one position and 1 where you have moved to a new location.
  2. Locate your images. 
    • Process in Lightroom. (make sure color/exposure/density is the same!)
      • "Sync" photos.
  3. Open both images in Photoshop.
    • Unlock background layers.
    • Locate one image. Hit (Command)⌘A to select all, and then ⌘C to copy. Locate your other image and ⌘V to paste. (Or drag and drop)
      • You can lower the opacity on one layer and use the move tool (v) to align the two images.
  1. Once they are where you want them, Go to the Layers Palette. Make sure one layer is selected. Drag this layer onto the layer mask icon to create a layer mask.

5. It should now look like this: 


6. With the white box in the layer mask selected, press ⌘I to invert the layer. Your screen should now look like this:


7. Select your brush tool (B) and make sure that your painting with white. Using 100% opacity, paint out the subject to erase it from view. 


    •  When finished, save one copy with the layers as a PSD. This is a working file for your records, in case you want to go in and change anything later. 
      • Now go to Layer -- and Flatten Image.
        • Save this copy as a TIFF (for print) and as a JPEG, to upload to blog.
  1. Lastly, upload your 2 completed "Multiple Me" to your blog no later than before class on 3/28. 
  2. We will critique the "Levitation," "Multiple Me," and "Hockney" assignments next class, March 28. Please post to the blog BEFORE class, and bring your files / cameras with you to class. We will learn to print, and if time allows, talk about the Final Portfolio.

Monday, March 17, 2014

Hockney

Monday, March 17 Happy St. Patrick's Day! 

Welcome back Class!

I hope you each had a wonderful, restful, and productive Spring Break! We're now back to the grind and we have maybe what, six weeks left of classes?


This week we will build upon the "Levitation" assignment and incorporate multiple selves into the frame to complete the "Multiple Me" assignment. We will start off with an inspiration lecture, followed by in-class shooting time (bring your cameras!), followed by demo, and then open lab time. 

I will be available to help with any assignments.


The following projects will be due and will be critiqued next week on March 28: Levitation, Hockney, and Multiple Me assignments.

Aaron Hwang, Student Work 2013

Aaron Hwang, Student Work 2013

To Review:

Last class meeting, the lovely Ginger Sisco Cook led the class while I was away at SPE and went over the David Hockney assignment. I've included some images for reference below.

David Hockney!

Your assignment was to create at least two solid "Hockney" style images. You will need to add something to his style to make the images your own. 

  • Tip: use a lot of images. From multiple viewpoints, different lighting situations, multiple perspectives, etc. 
These are due next Friday, March 28 on your blog. 


Friday, February 28, 2014

Levitation

Today in class we will work on our Triptych and Levitation projects. 


Next project, Levitation!


Example of historical levitation photography

Remember, photographers have been manipulating images long before photoshop!

Falling Teacher

Now that we have each made one Levitation image in class, and each of you is now a pro... For the next assignment, you will create 3 amazing Levitation images! Using either yourself or a model for the image. (It must contain a person)

  • Think about the story you will try to tell. Consider the background, lighting, color, costume, hair, props, and accessories... I want an AWESOME ONE!
      • In class, we did a quick and dirty method with the Eraser tool for the weekly assignment. But for the AWESOME ones, I would like you to use the method I have listed below. (scroll to bottom of post)
Here are some helpful links for inspiration and tutorials:

Here are two really great tutorials, that go a little more in depth.
*using Selections: http://youtu.be/ZM0dc9qix9Y
  • He demonstrates syncing photos using Camera Raw in Adobe Bridge. You will be doing this in Lightroom. You can skip to 1:40.
* using Layer Masks: http://youtu.be/HprleMPd1WY

Inspiration Images/Links:


Student Example

Student Example


Assignment for this week: "Levitation"


  • I want you to upload the Levitation image to your blog that we did in class. Title your post: Levitation - Class.
  1. For the AWESOME assignment, You will take a minimum of two photographs for each image. One of the empty scene and one with you "levitating."
  2. Locate your images. 
    • Process in Lightroom. (make sure color/exposure/density is the same!)
      • "Sync" photos.
  3. Open both images in Photoshop.
    • Locate your empty scene image. Hit (Command)⌘A to select all, and then ⌘C to copy. Locate your Levitating image and ⌘V to paste.
  4. In the Layers Palette, make sure the empty scene is selected. Drag this layer onto the layer mask icon to create a layer mask.
5. It should now look like this: 

6. Hit ⌘I to invert the layer. Your screen should now look like this:


7. Select your brush tool (B) and make sure that your painting with white. Using 100% opacity, paint out the object to erase from view. 
  • As you get closer to your body, you can lower the brush hardness, as well as the opacity and flow. This will allow for a cleaner erase and a more realistic "Levitation."

    1.  When finished, save one copy with the layers as a PSD. This is a working file for your records, in case you want to go in and change anything later. 
      • Now go to Layer -- and Flatten Image.
        • Save this copy as a TIFF (for print) and as a JPEG, to upload to blog.
  1. Lastly, upload the In Class Assignment to your blog no later than before class on 3/7. 
  2. The 3 images for your AWESOME Weekly assignment, will be due March 21. Please post to the blog BEFORE class, and bring your files / cameras with you to class. We will learn to print.